This is what I have so far. The rest will be repetition of these patterns for the most part.

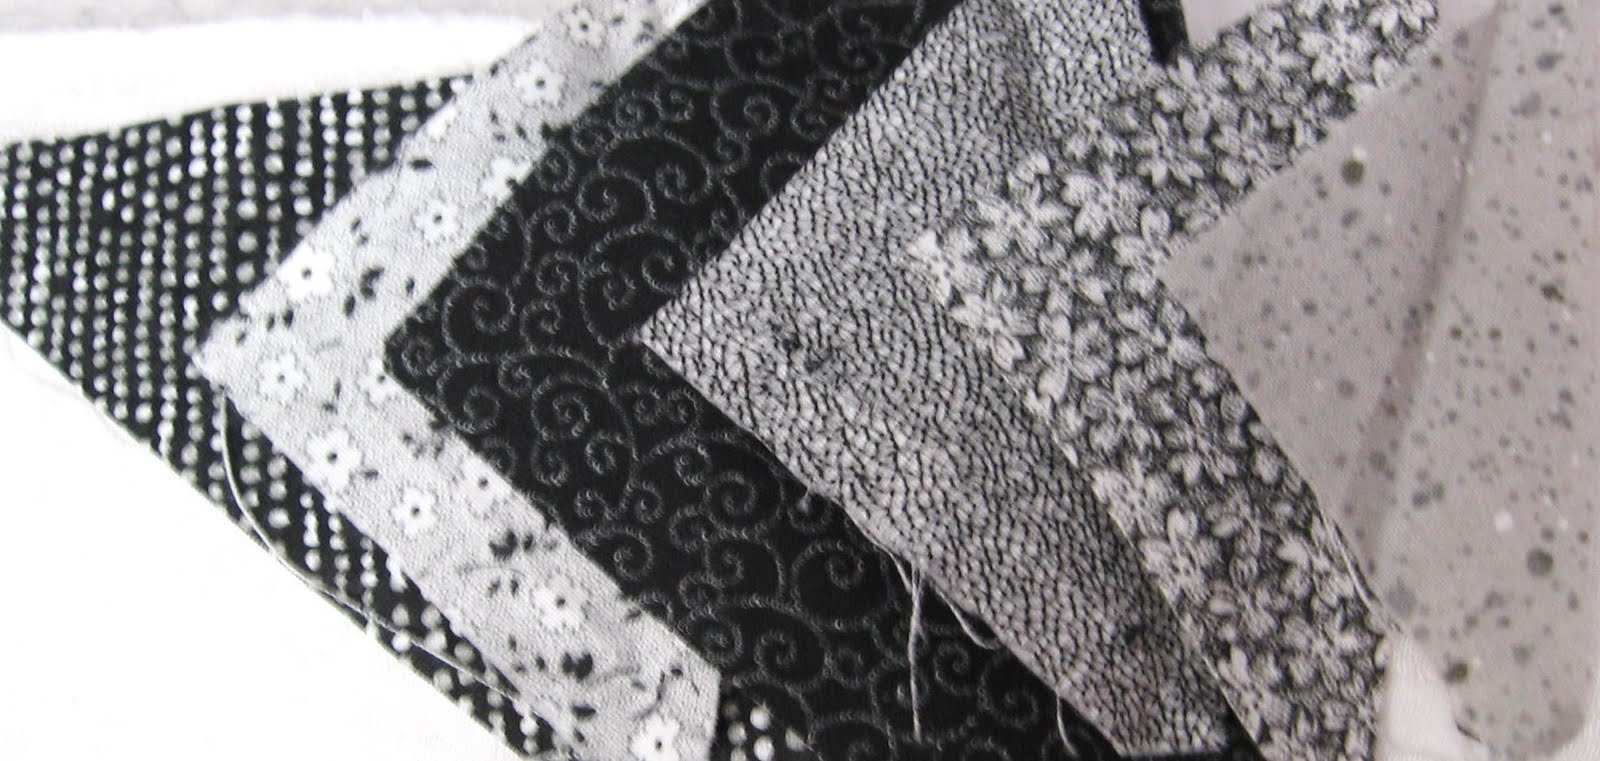
There are 6 different fabrics used in this quilt. It's mostly a monochromatic look with a couple of darks thrown in for effect. Each strip is cut 3" wide and sets of 2 strips (according to pattern) are sewn together- lengthwise and then cut into triangles. There are a couple of places where there are 3 strips sewn together. This is necessary to make the blocks square. The fabrics represent 1 to 6 from left to right in the photo below.
Below is the basic layout of the whole quilt, but I might need to do some half-blocks or extra borders to make
the finished dimensions correct, since this is basically square.

Starting with the center block (outlined in blue above), I am using all 6 fabrics as shown in the diagram below. I have drawn lines to show where the triangles are. So, for the center block I am sewing together strips of fabrics # 1 and # 3, #2 and #3, #3 and #4, and #3,#5 and #6 ( the only 3-strip triangle in this block).

After the strips are sewn together the triangles need to be cut. The base of the trangle is about 11.5 inches . The height is about 5.5 inches at the point. When you cut the triangles, for example, with the #3 fabric at the top point, you have left, the opposite triangles with the #3 at the bottom. Those, as well as the other "opposite" triangles, I am using in the other surrounding blocks or borders around the entire quilt

From the example of fabrics #2 and #3 in the photo above the triangles with the #2 fabric at the point of the triangle and the #3 fabric at the bottom are used in the blocks surrounding the center block. These are outlined in blue in the photo below. Actually there will be a third strip of #5 fabric (mentioned above) sewn to this triangle to complete the size needed to fill out the large square block.


This is probably a bit confusing to beginners, but for you avid quilters.....it should give you a pretty good idea of what I am up to. I will hopefully add more details about my progress as time permits. If anyone is interested in more details about construction of the quilt or the pattern idea, I would be very happy to share as best as I can. I will admit it was a sort of fly-by-the-seat-of-your-pants design. But I will do my best to explain or answer questions. Just contact me by email : lynettelwilliams@gmail.com
Hope it inspires you to strip quilt. It really is a very versatile way to make quilts quite fast !
Have fun !!
LW
Hi Lynette, I just wanted to stop by to say hello and thank you for following my blog (A Painterly Life). =) I also wanted to say:
ReplyDeleteYou quilt!?!.... That's awesome! And beautiful work you have here. I have always wanted to quilt, and in fact I have saved a lot of my children's cotton baby clothes for my (some day) quilting endeavors. =) I am currently making yo-yos for a coverlet. For some reason, I am MUCH more comfortable hand-sewing. I think that I find a machine intimidating, but I plan to learn this summer. Lovely to meet you!
Your work is meticulous! Thank you for showing the how-to's ..... You make it look so easy!
ReplyDelete